Interior leaking
Now, before I begin I’m no expert but this is the type of guide I would have liked to walk me though tracking down this leak. This is a step by step guide. I have done my research. The forum at passatworld.com helped me track down what the problem was.
Picture the scene, I’ve spent five hours cleaning the car, a nice shiny polished beast. A quick final hoover of the inside and disaster… water in the back of the car behind the drivers seat (UK). It was just a small puddle but still it was there…. in my car…. Un invited….
So I did some research. I discovered that the transmission control and comfort control modules (CCM) are under this section of floor. You don’t have to know what these are, all you need to know is that they are expensive to put right if they go wrong and sitting in water is just the kind of thing that might make them do that.
If you have issues with your CCM have a look here.
I did some more research and found out this could be caused by a blocked drain hole under the pollen filter. I looked for a good hour and couldn’t find a guide so made one myself and this is it. Like I said, I’m no expert but I have written the type of guide I would have liked to have had to hold my hand while I tried to sort the leak.
Are you sitting comfortably?
Yes? Then I shall begin.
Before you begin please read through the guide from start to finish, will save you time if you have a better idea of what your doing. I also recommend you get a Haynes manual if there is one for your car.
If your not very sure of what your doing I recommend you get your digital camera / phone out and take photographs before and during work. That way you can refer back to then if your stuck putting things back together.
OK, here goes. You need to gather some things together –
-
- Socket set, 14mm socket
- Size 10mm spanner
- Some old rags
- Big fingers
Step 1 – Having a quick look see
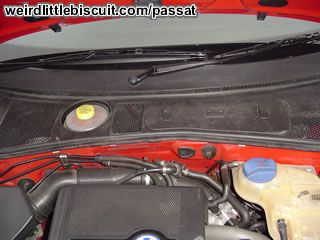
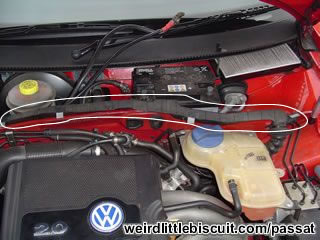
When you open up the bonnet you will see something pretty similar to this. My Passat is a UK 2001 B5.5 so if yours isn’t there are bound to be some slight differences but I can’t imagine anything would be greatly different in a B5 series Passat.
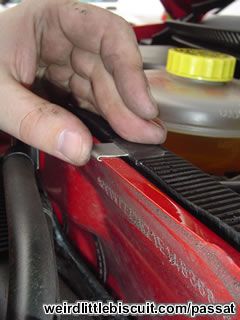
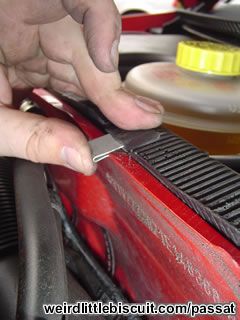
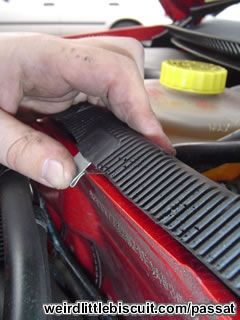
Step 2 – Removing the seal
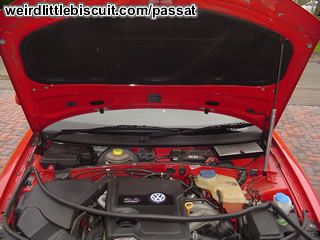
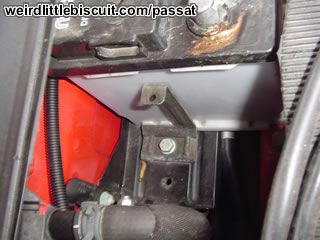
The first thing you need to do is remove the seal that runs around the edge of the engine to remove the battery cover. The rubber seal just pulls off and the cover just slides out by pulling it towards the front of the car. You should be left with something similar to the image below.
Note:
The B5 (2000 and older) does not have a cover over the battery. So don’t panic. It’s not missing.
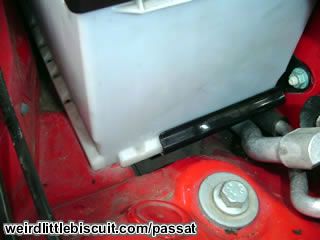
Step 3 – Whats causing the leak ?
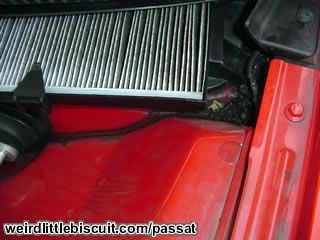
This is a close up of the pollen filter which needs changed, but that is a job for another day. As you can see there is a line of sludge along the route the water run off should be taking. Over time its this sludge that blocks the drain holes. If your car doesn’t have this sludge the drain holes could still be blocked. Might be worth looking into it anyway.
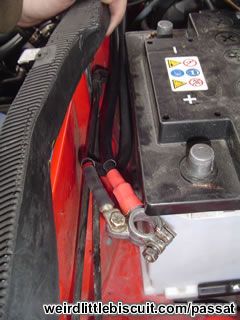
Step 4 – Getting at the drain holes, Removing the battery
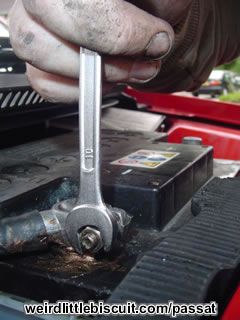
There are two drain holes and to get to them we need to remove the battery and the shelf it sits on, don’t be frightened, its easy really. First off the battery needs to be removed using your trusty 10mm spanner mentioned earlier.
Note:
Remove the negative cable (black) terminal first.
Once you have removed both the cables from the battery you will be faced with this which clamps the battery in place.
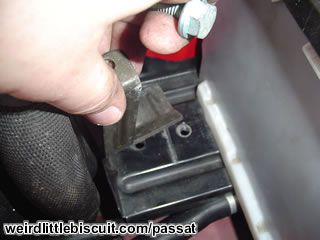
Using a 14mm socket remove the bolt and clamp which just lifts off.
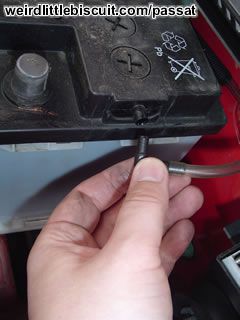
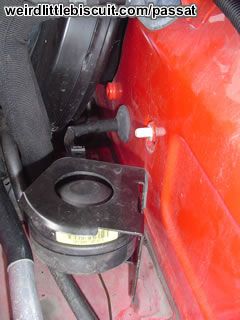
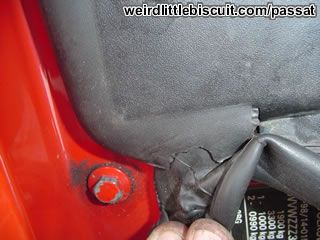
Wouldn’t life be nice and simple if the battery just lifted out at this point. Well life isn’t and it doesn’t 🙂 This little hose at the right a hand side for run off from the battery just pulls out.
Step 5 – Removing the cable
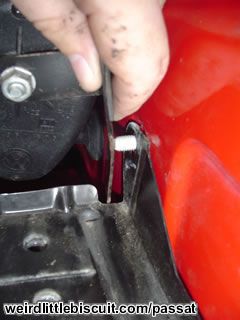
The cable marked here needs to be un clipped from the body of the car to allow you to remove the battery.
If you know what this cable is called, can you let me know 🙂
There are metal clips that slide off if you pull them towards the front of the car.
1…
2…

3…
Step 6 – Lifting the battery out
The shelf the battery sits on has a lip at the right hand side which, together with the clamp we removed earlier hold the batter in place. The battery needs to be slid to the left so it clears this lip then it simply lifts out. Remember though its bloody heavy and contains acid and other nasty stuff. modern batteries are sealed but its best to keep it level and treat it with a little respect just in case.
The removed battery and clamp. Now its time to take out the shelf the battery was sitting on my drive, by this point I’m quite proud of myself… And thats the hardest bit done.
Step 7 – Remove the battery tray
Now the shelf the battery was sitting on needs to be removed. It is held in place with two nuts and a bolt. This image shows the top left of the shelf with the nut removed. This one nut holds the alarm sounder (that’s what it looks like to me anyway) in place as well as securing the shelf to the body. The alarm sounder and the shelf slot together so they have to be unslotted. With all the fixings removed and the alarm sounder out of the way the shelf just lifts out.
Ta da, the shelf is out, you can unclip and remove the alarm sounder if you want, I just didn’t want to risk getting the electrical contacts dirty with all the dirt and sludge that was down there.
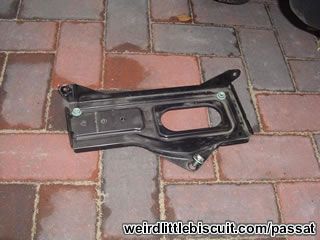
The battery shelf and fixings sitting on the drive.
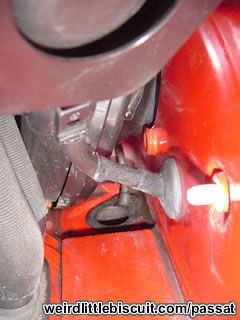
Step 8 – Unblocking the drain holes
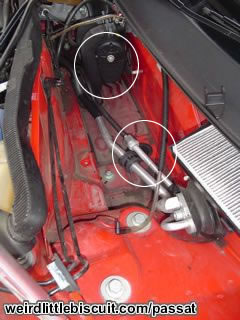
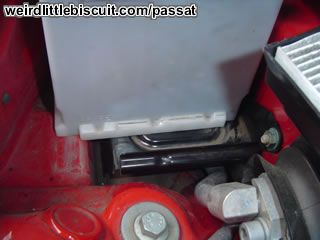
So that’s the hard bit done, your car should now look something like this. The two drain holes are circled. They are about 2″ across and have a rubber edging. Its easier to see if you look at the drain hole closest to you in the picture. If you poke your finger in you will feel a little rubber skirt. Basically its this little rubber skirt that causes the drain holes to become blocked and in turn flood the interior of the car.
I have read about people removing these rubber skirts. There is logic behind this, if there is no skirt then there not possibility of it becoming blocked. I consulted friend of mine (you know who you are you big ginger professor of thermodynamics you) and found out that these skirts are there to stop road spray and other things coming up through the holes. As you can see I left mine in place but the choice is yours.

The big black thing you can see at the top left is the break master cylinder and under this you can see the second drain hole which is very gunked up with sludge.
All clean and unblocked. To clear the blockage all you need to do is give it a quick poke and a wipe with a cloth and the gunk is all gone. When you poke the blockage through it just ends up on your driveway. I pushed a little too hard and the rubber surrounding and skirt went through the hole. Its a pain to get it back up through the hole and reattach so be nice and gentle, treat your car as you would a lovely lady 🙂
Step 9 – Sticking it all back together
So with everything de-gunked its time to put everything back together. When reconnecting the battery shelf, remember to put the alarm sounder after the shelf is in place or it wont slot together properly.
Slide the battery in place so that its hard up against the lip at the right hand side of the shelf.
Reattach the clamp at the left hand side.
Before you replace the clip on cable shown here you need to make sure the cables you are going to attach to the battery are tucked in this space as shown here. They wont slot through with the larger cable clipped in place.


When clipping the cable in place its exactly the same as removing it.
The battery needs to be reconnected using the good old 10mm spanner.
Re attach the battery run off hose at the right a hand side and check that the other end is pointing towards the newly unblocked drain hole.
Now you can replace the battery cover, the large bit of plastic that covers the area you have been working on.
Step 10 – Replace the seal
Nearly done, the final job to do in the engine compartment is to replace the seal around the engine and battery cover. Start at a corner and make sure that the rubber is pushed in tight. Also check that the battery cover is slotted correctly into the seal. Work your way round pushing it on firmly. Mine squeaked like a fat man on leather sofa, so if you hear that your doing it right.

Replacing the seal starting in the top left corner.
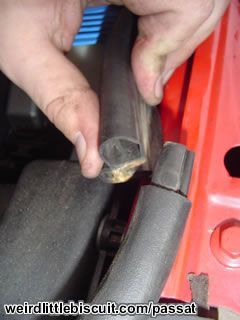
The seal that runs around the engine slots together at two points the left and right, make sure that these are properly slotted together.
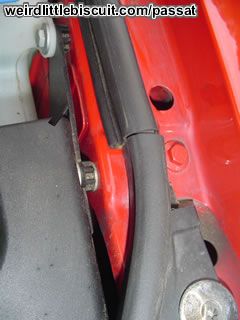
Seal in place and joined together.
Now your car should be back together in one piece and you should feel quite proud of yourself and pat yourself on the back for a job well done.
Step 11 – Drying out
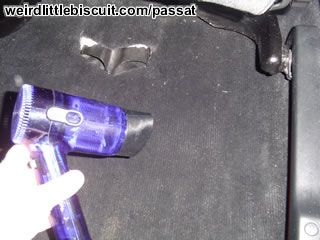
All that remains is to whip out the hair dryer and get rid of the wet spot.
Step 12 – Victory dance
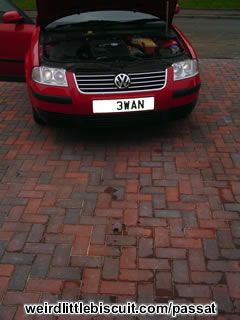
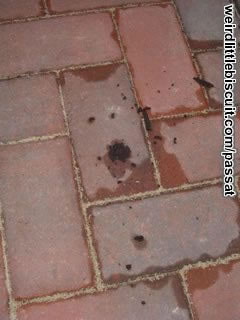
The offending dirt will be sitting on the driveway, its amazing that this little lump of muck no bigger than a 10p could end up costing so much in repairs. I recommend you kick it about a bit, I ran over it with the car a few times…. it made me feel a little better.
So that’s it, if you use this guide or have any questions or comments please contact me and let me know.
If your looking for technical advice you might be best to try the Passat world forums. I can help with some things but there are people there who really know their stuff.